Introduction
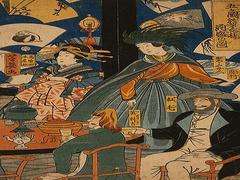
Woodblock printing is an ancient printing technique that has been practiced for centuries, particularly in Asian cultures. With its intricate process and attention to detail, woodblock printing has produced some of the most exquisite artworks in history. In this article, we will explore the fascinating steps involved in the traditional method of woodblock printing.
Step 1: Design and Composition
The process of woodblock printing begins with the creation of a design and composition. The artist conceptualizes the image, considering elements such as composition, balance, and visual impact. This stage often involves sketching, planning, and refining the design until the desired aesthetic is achieved.
Step 2: Carving the Woodblock
Once the design is finalized, the artist transfers the image onto a wooden block. Traditionally, a dense wood such as cherry or pear is used for the block. The artist uses sharp carving tools, such as chisels and knives, to meticulously carve away the areas of the block that are not part of the desired image. This process requires precision and expertise to create the desired lines, textures, and details.
Step 3: Ink Preparation
After the woodblock is carved, the next step is to prepare the ink. Traditional woodblock printing often involves the use of water-based inks made from natural pigments. The ink is mixed with a binder, such as animal glue or rice paste, to achieve the desired consistency and adhesion properties.
Step 4: Inking the Block
Once the ink is prepared, the printer applies it to the carved surface of the woodblock. A brush or a roller, known as a baren, is used to evenly distribute the ink over the raised portions of the block. The printer carefully ensures that the ink is applied uniformly, avoiding excessive or uneven application that could compromise the quality of the final print.
Step 5: Transferring the Image
With the block inked, it is time to transfer the image onto the printing surface, typically paper or fabric. The printer places the paper or fabric carefully onto the inked block, applying even pressure by hand or using a tool called a baren. This pressure allows the ink to adhere to the paper, resulting in a precise reproduction of the carved design.
Step 6: Repeating the Process
To create multiple prints, the printer repeats the inking and transferring process for each impression. This requires re-inking the block for each print and ensuring consistent pressure and alignment during the transfer. This repetition demands focus and expertise to maintain the quality and integrity of each print.
Step 7: Finishing Touches
Once the prints are complete, the artist may add final touches to enhance the artwork. This can include hand-coloring certain areas of the print using watercolors or other techniques, as well as adding signatures or seals to authenticate the work.
Conclusion
Woodblock printing is a labor-intensive and meticulous process that requires skill, patience, and artistic vision. From the initial design to the carving of the block, the application of ink, and the transfer onto paper, each step contributes to the creation of a unique and captivating artwork. The enduring beauty and cultural significance of woodblock prints reflect the dedication and craftsmanship involved in this traditional printing technique.
- Unveiling the Artistic Process: Steps of Woodblock Printing
- Japanese Woodblock History - Ukiyo-e: The Floating World Unveiled - A Journey into the Artistic Splendor of Japanese Woodblock Prints
- The History of Japanese Woodblock Printing
- The Artistic Journey: Exploring the Rich History of Japanese Woodblock Prints
- The Birth of a Revolutionary Technique: Woodblock Printing and the Tang Dynasty
- The Innovative Legacy: How Woodblock Printing Led to Remarkable Inventions
- The Significance of Japanese Woodblock Printing: A Timeless Artistic Legacy
- Unlocking the Beauty: How to Identify Japanese Woodblock Prints
- Unveiling the Ancient Art: Exploring the Oldest Japanese Woodblock Print


